Display External Weather API Data In Custom Panels
In this post, you will learn how to fetch data from an external data source and display it in a custom panel extension for Directus Insights.
Panels can only talk to internal Directus services, and can't reliably make external web requests because browser security protections prevent these cross-origin requests from being made. To create a panel that can interact with external APIs, you will create bundle including an endpoint (that can make external requests) and a panel (that uses the endpoint).
Add an Extensions Volume
Follow our Directus Self-Hosted Quickstart, adding a volume for extensions:
volumes:
  - ./database:/directus/database
  - ./uploads:/directus/uploads
  - ./extensions:/directus/extensions // [!code ++]
Create a Bundle
Once you have run docker compose up for the first time, local directories for the volumes will be created. Navigate to the extensions directory and use the Directus Extensions CLI to create a bundle:
npx create-directus-extension@latest
├ type: bundle
├ name: directus-extension-bundle-weather
└ language: javascript
Then, navigate to the newly-created extension directory.
Create an Endpoint
Use npm run add to add a new extension to the bundle:
npm run add
├ type: endpoint
├ name: weather-endpoint
└ language: javascript
Navigate to the new weather-endpoint/index.js file and replace it with the following:
export default {
    id: 'weather',
    handler: (router) => {
        router.get('/', async (req, res) => {
            try {
                const response = await fetch(`https://api.open-meteo.com/v1/forecast?current_weather=true&${req._parsedUrl.query}`);

                if (response.ok) {
                    res.json(await response.json());
                } else {
                    res.status(response.status).send(response.statusText);
                }
            } catch(error) {
                res.status(500).send(error.message);
            }
        })
    }
}
From the directus-extension-bundle-weather directory, run npm run build. Restart your Directus project, and you should now be able to access http://localhost:8055/weather?longitude=0&latitude=0.
The Open-Meteo API requires a longitude and latitude, so they must always be provided.
Create a Panel
Use npm run add to add a new extension to the bundle:
npm run add
├ type: panel
├ name: weather-panel
└ language: javascript
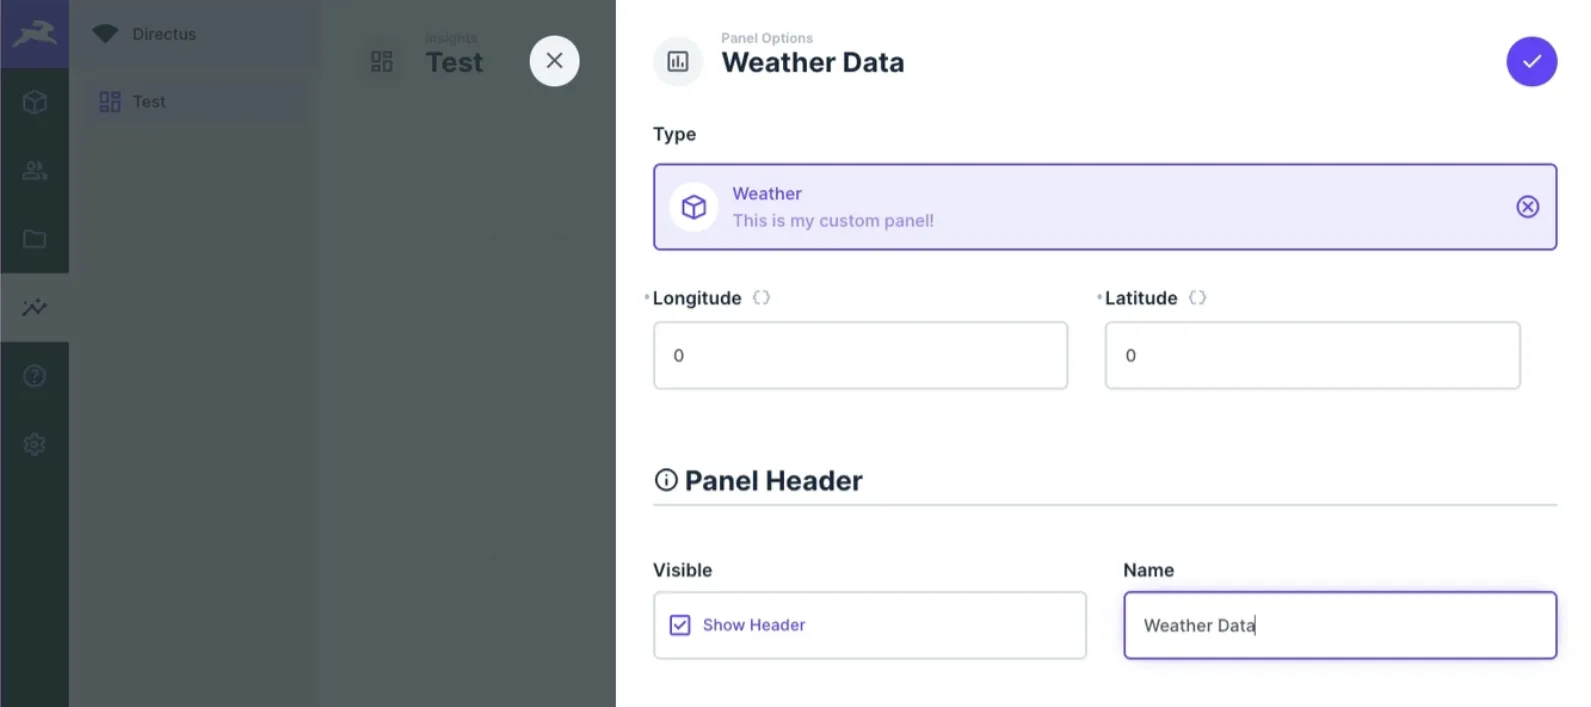
Navigate to the new weather-panel/index.js file, update the id to weather-panel and the name to Weather.
In the options array, remove the text field, and add two new fields for longitude and latitude:
options: [
    {
        field: 'longitude',
        name: 'Longitude',
        type: 'string',
        meta: {
            interface: 'input',
            width: 'half',
        },
    },
    {
        field: 'latitude',
        name: 'Latitude',
        type: 'string',
        meta: {
            interface: 'input',
            width: 'half',
        },
    },
],
Open panel.vue, and at the top of the <script>, import useApi and Vue's ref:
import { useApi } from '@directus/extensions-sdk'; import { ref } from 'vue';
export default {
Then, add longitude and latitude props:
props: {
    showHeader: {
        type: Boolean,
        default: false,
    },
    longitude: {         type: String,          default: '0',      },      latitude: {          type: String,          default: '0',      },  },
Create a setup method which will run when the panel is loaded:
setup(props) {
    const api = useApi();
    const weather = ref({});

    async function fetchData() {
        const response = await api.get(`/weather?longitude=${props.longitude}&latitude=${props.latitude}`);
        weather.value = response.data;
    }
    fetchData();

    return { weather };
}
This code will immediately fetch weather data using the new internal endpoint, and then make it available as weather to the template.
Finally, update the template:
<template>
    <div class="text" :class="{ 'has-header': showHeader }">
        {{ text }}  // [!code --]
        {{ weather }}  // [!code ++]
    </div>
</template>
Run npm run build from the bundle directory, and restart Directus.
Use the Panel
Create a new Insights Dashboard and add a Weather panel. Add coordinates, and you should see external data displayed in the panel.
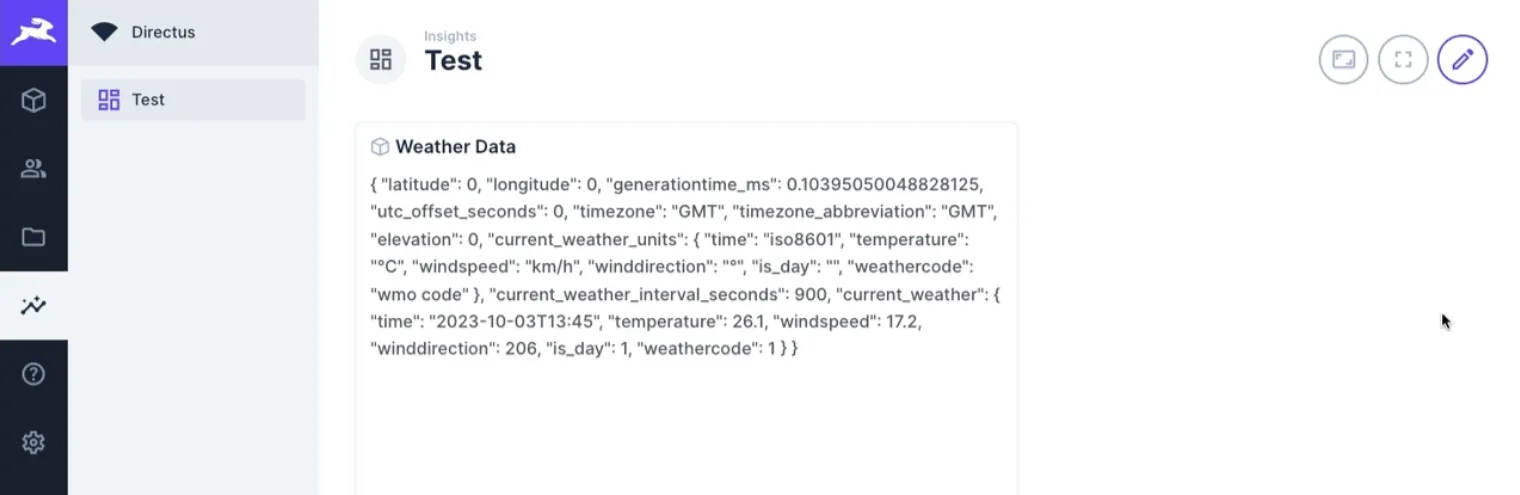
You can now create panels using external data. If you have any questions at all, feel free to join our community platform.